How to download and install LymeApp from AppCenter (iOS)
This guide assumes that you have already registered for AppCenter – if you have not yet registered, click here.
If you have just registered for AppCenter on your mobile device, and you have the option to “+ Add Device”, tap this option and start this guide at Step 5.
The following steps demonstrate how to download LymeApp from AppCenter onto your iOS device:
Step 1
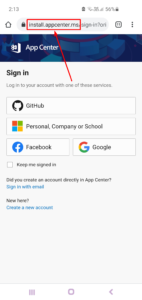
Open your device’s web browser and navigate to https://install.appcenter.ms
You may be prompted to log in, if so log into your AppCenter account which you previously created.
Step 2
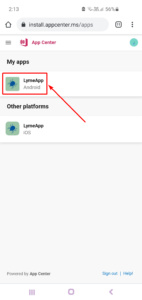
You should be greeted by the following screen with LymeApp (Android) listed in your ‘My apps’ section.
Tap on LymeApp.
Step 3
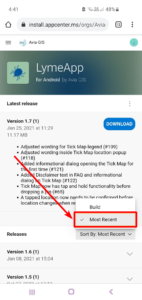
You will be redirected to the following page.
Ensure that the sorting order is set to ‘Most Recent’ in the dropdown menu (as indicated in the screenshot).
Once set, the latest version will be visible near the top of the page.
Tap the ‘Install’ button.
Step 4
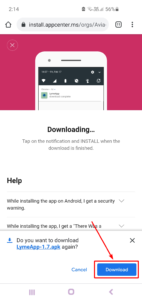
You will be prompted to download the LymeApp .apk file (Android Application Package).
Confirm the download by tapping on the ‘Download’ button.
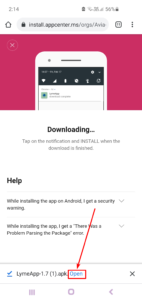
Step 5
Once the download has completed, you will be prompted to ‘Open’ the .apk file.
Tap on open, your device will begin the install process.
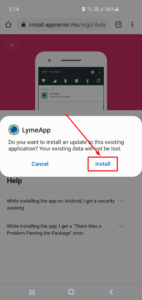
Step 6
You will be prompted to confirm that you want to install LymeApp.
Tap on ‘Install’
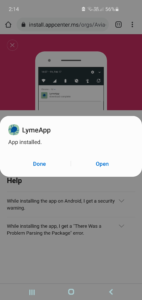
Step 7
Once LymeApp has been installed, you will see the following.
You can now either click ‘Done’ to close the prompt, or ‘Open’ to open LymeApp immediately.
Further Support
If you are still experiencing issues, please contact support@idmapps.com