How to download and install LymeApp from AppCenter (iOS)
This guide assumes that you have already registered for AppCenter – if you have not yet registered, click here.
If you have just registered for AppCenter on your mobile device, and you have the option to “+ Add Device”, tap this option and start this guide at Step 5.
The following steps demonstrate how to download LymeApp from AppCenter onto your iOS device:
Step 1
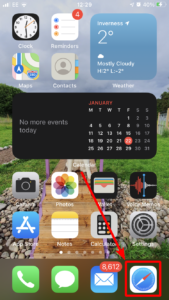
On your mobile device, open the web browser.
Step 2
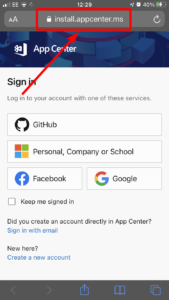
Navigate to https://install.appcenter.ms
Depending on what device you completed your AppCenter registration on, you may be prompted to log in.
Step 3
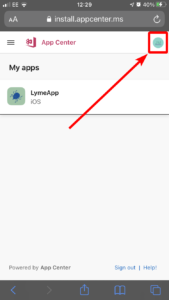
You should be greeted by the following screen.
If this is your first time accessing AppCenter on your device you will be required to register your device to your account.
Tap the profile icon as idicated in the screenshot.
If you have already registered your device to your account, skip to step 12.
Step 4
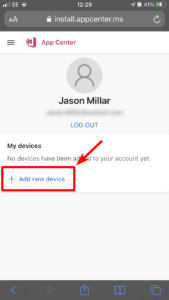
You will be taken to your AppCenter profile page.
Tap the ‘Add new device’ link.
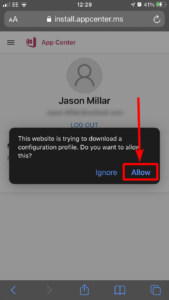
Step 5
You will be prompted to allow AppCenter to add a configuration profile to your device – this is required to allow AppCenter to install LymeApp to your device.
Tap the ‘Allow’ option.
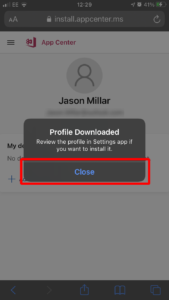
Step 6
The profile will begin downloading, after a short delay a comfirmation will appear stating that the download has been completed and must be installed via the settings app.
Tap ‘Close’ to close the pop-up, then open settings on your device.
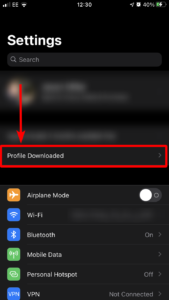
Step 7
In ‘Settings’ you should see the option, ‘Profile Downloaded’, as indicated in the screenshot.
Tap this option to begin the profile install process.
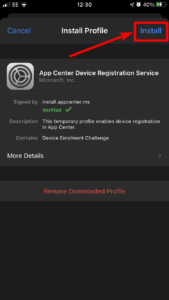
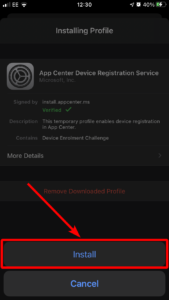
Step 8
The following will be displayed – tap ‘Install’ to install the AppCenter profile.
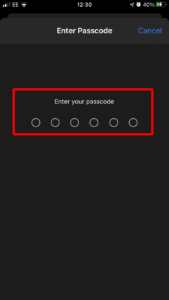
Step 9
You will now be prompted to enter your passcode.
This is the passcode which you have set on your device (the one you use to unlock your device).
Step 10
You will receive a final confirmation to install the AppCenter profile.
Tap ‘Install’.

Step 11
Once the AppCenter profile has been installed, you will be automatically taken to the following page in your web browser.
Tap the indicated image to be taken to the AppCenter Install homepage.
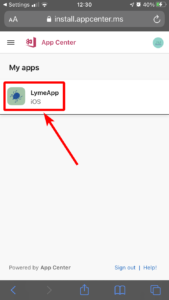
Step 12
You should see LymeApp (iOS) listed in your ‘My apps’ section.
Tap on LymeApp.
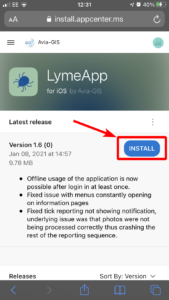
Step 13
You will be redirected to the following page, with the latest release shown close to the top.
Tap the ‘INSTALL’ button to begin the LymeApp installation process.
If you have just added your device, you may see a button labelled ‘GET’ instead.
If this is the case, click the ‘GET’ button in order to register your device for use with LymeApp. There will be a delay between this process and LymeApp becoming available for you to download (you may have to refresh the page after roughly 10 minutes). If after 30 minutes you are still unable to install LymeApp, please contact support@idmapps.com
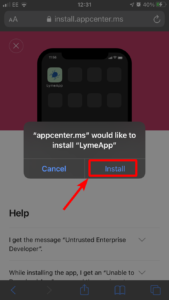
Step 14
You will be prompted to confirm that AppCenter can install LymeApp to your device – tap ‘Install’.
The download will begin as any other normal app download.
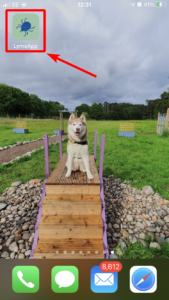
Step 15
Once the download completes, you will be able to find it on your Homescreen or in your App locker – depending on your OS version and preferences.
Tap on the icon to open LymeApp.
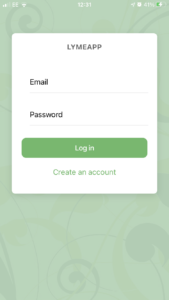
Step 16
The app should load and take you to the log-in page.
This completes the installation process of LymeApp.
For guidance on using LymeApp, please refer to the help articles at the following location – https://idmapps.com/help/lymeapp/
Further Support
If you are still experiencing issues, please contact support@idmapps.com